Behind the Scenes: My Creative Process for Stunning Designs
Every graphic design project begins with a vision—a concept that evolves into a stunning final product. Behind every polished design lies a structured creative process that ensures quality, consistency, and innovation. In this article, I’ll take you behind the scenes of my creative workflow, revealing how I turn ideas into impactful designs.
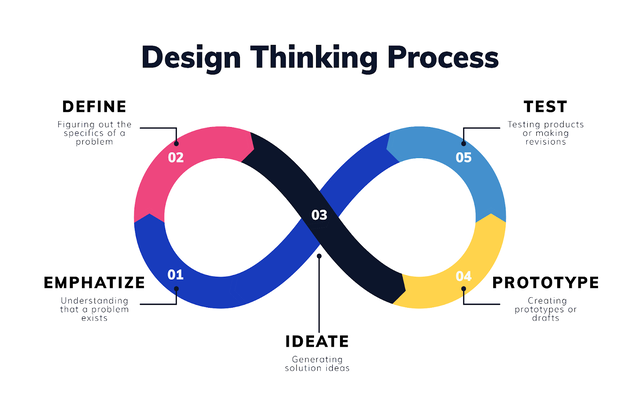
Step 1: Understanding the Client’s Vision
The foundation of any successful design lies in understanding the client’s needs and objectives. Here’s how I approach this:
Initial Consultation: I begin with a detailed discussion to learn about the client’s goals, target audience, and desired message.
Mood Boards: I often create visual boards to align on themes, colors, and styles.
Research: I dive deep into the client’s industry, competitors, and trends to ensure the design stands out.
Step 2: Sketching and Conceptualization
Once I’ve gathered the necessary information, it’s time to brainstorm and sketch ideas:
Freehand Sketching: I start with rough sketches to explore various concepts and layouts.
Digital Mockups: Using tools like Adobe Illustrator or Figma, I create digital versions of the best sketches.
Feedback Loop: I present the initial concepts to the client for feedback, ensuring we’re aligned before proceeding further.
Step 3: Refining the Design
With a clear direction established, I focus on refining the chosen concept:
Color Palette Selection: Colors are carefully chosen to evoke the desired emotions and align with the brand.
Typography: I experiment with fonts to find the perfect balance of readability and personality.
Details and Texture: Adding subtle details and textures brings depth and professionalism to the design.
Iterative Improvements: I test different variations and tweak the design until it meets my quality standards.
Step 4: Finalizing and Delivering the Design
The final stage is about perfecting and delivering the design in a format ready for use:
Polishing: I ensure every element is aligned, balanced, and optimized for different platforms.
File Formats: Designs are exported in multiple formats (e.g., PNG, SVG, PDF) based on the client’s requirements.
Presentation: I create a presentation to showcase how the design works in real-world scenarios, such as mockups on business cards or websites.
Client Handover: Along with the final files, I provide usage guidelines to maintain consistency.
Tools of the Trade
Throughout the process, I rely on industry-standard tools to bring my ideas to life:
Adobe Suite: For illustration, photo editing, and layout design.
Figma/Sketch: For UI/UX designs and wireframes.
Procreate: For digital sketching and custom illustrations.
Trello/Asana: To organize tasks and stay on schedule.
Real-Life Examples
To illustrate this process, let’s look at a couple of projects:
Brand Identity Design: For a startup eco-brand, I crafted a logo inspired by nature, using earthy tones and minimalist icons to reflect sustainability.
Website Design: For a tech company, I designed an intuitive user interface with clean lines, bold typography, and engaging visuals to enhance user experience.
Lessons Learned
Over the years, I’ve learned that every project has its challenges and opportunities. Here are some key takeaways:
Collaboration is Key: Regular communication with clients ensures their vision is reflected in the design.
Embrace Feedback: Constructive criticism helps refine and elevate the design.
Stay Inspired: Following design trends and experimenting with new techniques keeps the creative spark alive.
Conclusion
Creating stunning designs is both an art and a science. My structured yet flexible approach ensures that each project is tailored to the client’s needs while showcasing creativity and innovation. By sharing this behind-the-scenes glimpse, I hope to inspire fellow designers and clients to appreciate the meticulous effort behind every great design.


